Image Map

Wednesday, November 30, 2011

Decking the Halls - Part 2

The Tree in the Window


I didn't have a plan this year when it came to decorating for Christmas as I always have in years past.  Usually I have sketches drawn up months in advance on how I want to decorate the mantel and what I envision the entry way to look like...what colors I see in these spaces.  This typically involves creating a budget specifically for Christmas Decorations.  Who does that?  Please tell me I am not alone here.  My Christmas Fund is set up months...sometimes as much as 7 months in advance!  GHAH!  Who thinks of Christmas in June besides me?  Seriously people...its an illness.

This year has been different.  Much due to circumstances that are beyond our control...and some due to the desire to show our children that Christmas is so much more than the decorations and presents under the tree.  Christmas is about family and "giving" of oneself to others.  This year our motto for the season is "simplistic".  Our decorations are simple and meaningful...used from what we had on hand.  If I had a space that needed a little "something" I either made it ... or robbed it from my moms house!  YEA, thats right!  You gotta use all the resources you have people!

After I tackled the wine bar I set my sights on the kitchen.  It is the "hub" of our home.  Lots of conversations and laughter are had in this room so it needed to come alive with the spirit of the season...but in and understated kind of way.

It started with the tree on the window seal.


I had that cute little metal star in my wine bar on the neck of a bottle and thought it would make the perfect star for the tree...SNAG!  Then I remembered an old bucket that I used to hold wash cloths in under my kitchen sink...SCORE!  And thus the Christmas tree was born.  I love how it turned out don't you?

Then it was time to dress up the shelf a bit...


The mason jars were already there so I filled them with some mini ornaments that I had from last year.  The wooden trees are from a treasure hunt at my mom's house!  Thanks mom!  The stocking hanging from the hook was a homemade gift from my mom for Mr. AKM and my 1st Christmas together.  I love that it works in this space :)

And in the end...this is what we had to greet us for breakfast in the morning....


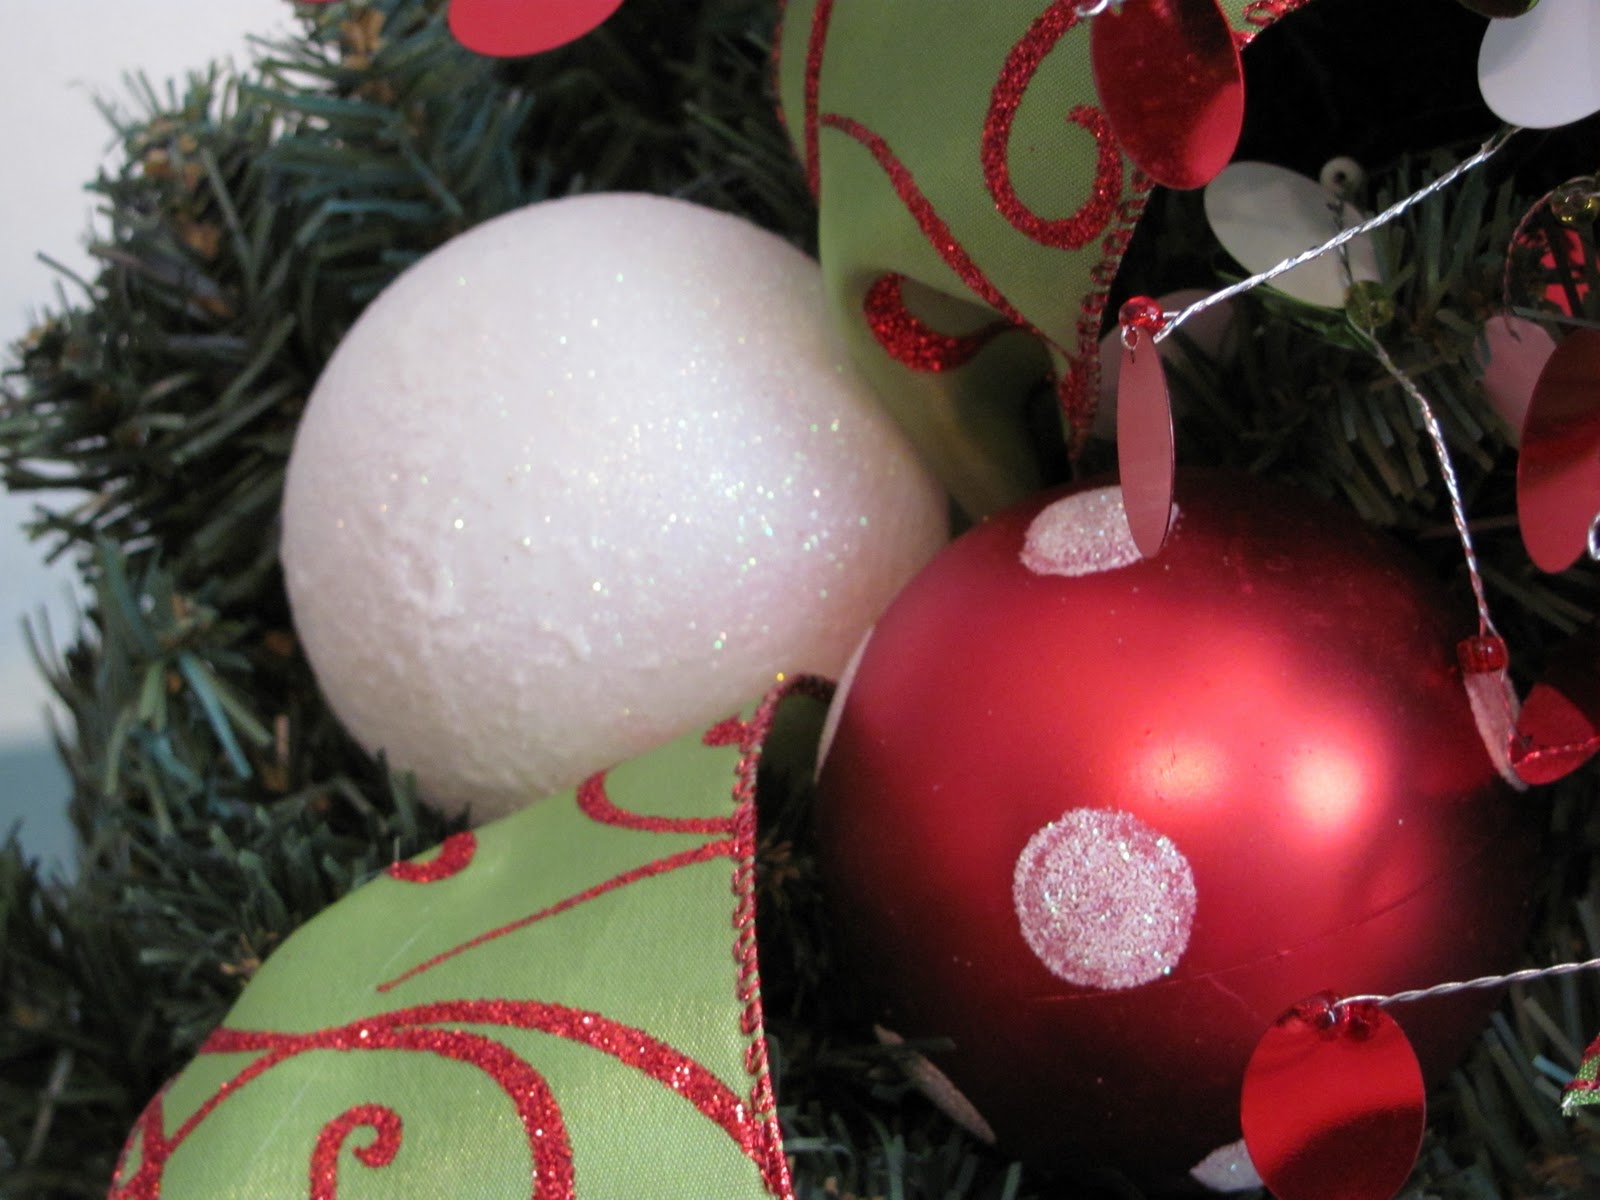
A Christmas ball of "Joy"!  So tell me what your motto for the season is!  Are you going all out or reigning it in this time around?

Linking up to the following parties...

Tuesday, November 29, 2011

I've been put in the spotlight!

I'm so excited to announce that my Christmas wreath was put in the Spotlight over at one of my personal fav's Craft-O-Maniac for the Saturday Spotlight Talent Show!! SQUEAL!   I'm so excited!  You must go check out her blog folks...like RIGHT NOW!  It is chock full of AWESOME DIY fun!  Definitely a blog full of inspiration.  Go check it out!  Seriously...go now...Craft-O-Maniac.

Monday, November 28, 2011

Decking the Halls


Santa and the Tiny Reindeer 


The Christmas Spirit blew thru my home like a hurricane this past weekend.  There were boxes and boxes of ornaments, lights and decorations galore scattered all through the halls and stacked as high as the eyes could see.  At one point I was certain that I had lost my little pup but soon found her nestled all snug in her bed with visions of snowmen filling her head!  Or maybe it was a vision of a snowman that had fallen in her bed...but whatever, she was all snuggled in with the snowman covering her head!

I sat in the middle of my living room floor staring at my abundance of boxes and wondering when I had accumulated so much Christmas Crap?  Yes, I said crap because at this point my holiday cheer was completely lost upon realizing that I had to unpack said boxes and figure out where the heck I was gonna put all this crap stuff.

I pulled myself up off the floor and headed for the wine bar to pour myself a glass of holiday cheer to help get the creative juices flowing.  When what to my wondering eyes did appear but a vison of santa and little tiny reindeers!  I immediately ran to my boxes and began my search when out like a flash these deer did appear!


And shorly thereafter, santa himself...


And what room would be complete without a Christmas tree...


And with it being a "wine bar" it only seemed fitting to use corks as "ornaments"


And from there the room just seemed to complete itself!
Whew!  One bottle of wine room down and six more to go!  Oh deer! 

So what area did you choose to decorate first this year? 

Linking this up to the following parties...go check them out!


Tuesday, November 22, 2011

Blog Award!


WOW!  (sheepish grin)  I am so honored to have received this award.  Gosh...I don't know what to say except THANKS!  

Melissa with Shabby Love was so kind to pass this on to me!  I am incredibly grateful!  Please pop over to her blog and take a look around.  She is incredibly talented.  Thank you Melissa!

As with most things in life, there are rules that accompany the receipt of this award...

After accepting the Versatile Blogger Award, the blogger must:

1. Thank the person who gave the award and link back to them in your post.
2. Share seven things about yourself
3. Pass this award along to 10 recently discovered blogs

So...here goes with (7) things about myself.  Drumroll please...

Number 1 - I'm afraid of the dark.  Its true!  I have to sleep with my TV on at night to combat this.  It's a horrible habit.

Number 2 - My husband and I met in a bar WHILE I was on a date with another man!  GASP!  But hey, it all worked out!  (we've been married 14 years this month)

Number 3 - I am INSANELY afraid of needles.  So much so that I freak out the person in charge of administering shots or drawing blood.  It's not pretty people.

Number 4 - It is a dream of mine to live in Colorado...Manitou Springs to be exact.

Number 5 - I had my first son in a Turkish Hospital in Turkey delivered by a Turkish Doctor.  No one spoke English but my husband and I...and we did not speak Turkish!

Number 6 - I lived in Turkey for a year and a half while my husband served for our Armed Forces!  (I'm so proud of you babe!)

Number 7 - My ultimate dream is to have my childrens book published...or any book I am working on for that matter!

Thats it folks!  Now to pass this along to 10 well deserving others...

Friday, November 18, 2011

A place in time...

An Heirloom Classic...Re-vamped!

First of all I want to thank Courtney at Between U and Me for having me as a Guest Blogger!  If you haven't seen her stuff you need too like NOW!  I struggled with an idea on what I should post about today.  After much speculation, I decided it was time to dive into some serious Chalk Painting!   I was over-the-top a bit nervous with this project as it is a family heirloom.

We’ve had this cabinet for years.  It has sat un-noticed, stuck in a dark corner forever filled with our DVDs.  It was functional.  That’s about all I could say about it.  While I did like the looks of it, I wasn’t in love with it.  I did love the little glass knob on the door; however.  And the beadboard on the back and I REALLY loved the shape of it.  But more than looks, I loved the history of this piece.  You see, it belonged to Mr. AKM’s grandmother.  If memory serves correct, his grandfather actually made it.  I love the way it smells of old wood…not musty and gross…but rather more of history, time and use.  Sometimes I would just run my hand over the top to feel the indentations and wonder how they got there.  The glass on the front cracked during a move across the country.  I went to have it replaced but they could not match the glass.  The glass is the original glass from the early 1900’s.  It’s not smooth like glass is now.  You can see small ripples or waves in it.  I love that about it so I opted to not replace it but instead stuck a piece of tape to hold it together.  I am hoping to find someone that can repair the glass as opposed to replacing it someday. 


So why paint it?  Well, there is this wall in my dining room that has been BEGGING for something to fill it.  I’ve looked all over the place for a small table or hutch but nothing seemed to fill the “void”.  When one day it hit me…I mean like literally HIT me.  Like I opened the cabinet door and it fell over and hit me kinda thing.  Not cool.  But while I was picking up the spilled DVDs I realized what AWESOME potential this had!  It’s like it called out to me…Paint me!  Paint me!  Who was I to deny it it’s true self? So, I did just that, I painted it!

So let’s get on with the pictures shall we…because we all know that is why you are really here!  It’s ok…I can handle the truth.  Here it is.  The piece de resistance (say it with a French accent).  Go ahead, try it again…piece de resistance.

Isn't it GOR-geous?  I am seriously in love with this piece now.  I mean like over-THA-top in LOVE!  I know the lighting is a bit off...Daylight savings has seriously messed with my photo ops!  

How did I get to this most awesome piece of awesome-ness you ask?  Let me give you the dets.  It all started like this....

Sand...sand...sand...then vacuum all the saw dust off...then sand some more and vacuum again.  Not a fun process I must admit but totally worth the efforts.  I chose to only sand the top since I was using Chalk Paint on the base.  No sanding necessary for that!  LOVE ME SOME CHALK PAINT!

Once the sanding/vacuuming was complete I wiped the entire piece down with a tack cloth to remove all the remaining dust.  I then applied two coats of Minwax Dark Walnut stain to the top only.  I wanted to preserve the original look of the cabinet by doing this. Then I moved on to painting the cabinet itself.  I used Annie Sloan's Chalk Paint in Old White.  I rolled on the 1st coat using a sponge roller then brushed on the second.  This is the finished look before sanding/distressing it then after.

WOW!  Are you loving this as much as I am?  After all the distressing I applied a coat of Annie Sloans Clear Wax with a cheese cloth then buffed.  That was it!  So totally easy!  Mr. AKM decided he wanted the doors to stay the original color as well since we were leaving the top and the shelves that way.  I was a little on the fence with that idea until he put them on...
And then some photo love for you...


Its like it was meant to be...the perfect cabinet and the perfect spot! 

And one last look at the before and after.  LOVE HER!


So tell me...what do you think?  Do you prefer the before or the after? 

Linking up to these parties

Thursday, November 17, 2011

Shake it like you mean it...


A Marriage Made in Heaven...


A few years ago when they talked about a shortage of canned pumpkin I might have freaked out a little bit and stock piled as much of it as I could sneak by my husband.  True story.  I believe at one point I had like 20 something cans of it tucked away in the dark corners of my pantry hidden behind boxes of healthy foods that I knew he would never touch.  Again, this is a true story.  Any time I mention pumpkin to my family I get this whole eye roll thing as they say "not again mom"!  Whats wrong with pumpkin people?  It's orange, it's good for you...filled with antioxidants, has a creamy texture and um, HELLO!  It's ORANGE!  Need I say more?  I think not.  I might also have a mild obsession with the color orange...but I can blame that on my youngest son.  He has an obsession with University of Texas...as in Longhorn Orange!  He actually bleeds that color.  No lie! 

I think I'm getting a little off the subject here.  So with all my cans of pumpkin lingering around and my LOVE of my morning protein shakes I decided the two should meet.  Shake meet pumpkin...pumpkin meet shake.  It was a marriage made in heaven!  I won't bore you with the details other than to say that make sure the banana used is FROZEN.  This is a must people!  The frozen banana is what gives this shake the creamy, dreamy milkshake type texture.  If you are into pumpkin pie...this shake will rock your world! 

Now, go get your blender and SHAKE IT LIKE YOU MEAN IT!

Pumpkin Pie Protein Shake
Recipe makes 1 large shake

1 - c. milk
1 - large scoop Vanilla Protein Powder
1/2 frozen banana
3/4 c. pumpkin puree (you can use canned Pumpkin Pie Puree too if you don't mind the sugar)
2 Tbs. ground flax seed (optional - I use it cuz its good for my heart)
1/2 tsp. pumpkin pie spice
1 tsp. local honey (optional - I use it cuz its good for allergies)

Put all ingredients together in a blender.  Blend until smooth.  Sprinkle with nutmeg if desired or even some crushed up graham crackers...or whipped cream!
Posted by Picasa

Wednesday, November 16, 2011

Guest Posting


Today, I'm guesting posting over at Between U & Me for the oh so talented Courtney

I am going to be giving a tutorial on how to use chalk paint, so if you're curious about that you might just want to pop on over and check it out.

While you are there take a peek around her site and check out her current giveaway at Zoey's Attic.


Tuesday, November 15, 2011

Let the Holidays begin...


It's beginning to look alot like Christmas!


I can't believe it is already this time of  year again...I mean, wasn't it just July last week?  I swear the older I get the faster time flies by!  Does anyone else suffer from this?  My kids talk about how bored they get and constantly complain that they have "nothing to do".  I wish I suffered from boredom for just one day.  Wouldn't that be nice...I solid day of nothing-ness?  I wouldn't want it to last forever mind you.  Don't tell Mr. AKM but I secretly LOVE my little corner of chaos.  Actually, I kinda thrive on it.  I'm afraid if I didn't have something to do with my time I might go crazy...like straight jacket in a padded room kind of crazy.  Not cool!  Then I'd be forced to figure out how to decorate my padded room with all kinds of soft cushy things with just the use of my toes.  Over-the-top crazy!

Oh...sorry, I tend to go off on tangents as I'm sure you figured out by now...back to the wreath.  My sis was in need of a new Christmas Wreath this year to grace the front door of her new home.  All she gave me to work with is "I like snowmen" and "my colors are red and green".  Hmmm...I can do this!  So off I went in search of all these things.  Hobby Lobby was having a 50% off sale on Christmas ribbon so I scored me three rolls of some red and green!  I decided to go for a fun shade of green instead of the traditional.  I prefer to work with plastic balls on my wreaths.  I'm a little on the clumsy side and drop things so this helps to save them from breaking.  Target was the place for these! I love the ornaments this year!  So many fun pops of color!  After I got all my supplies it was time to put the wreath together!

First came the ribbon and bow making.


I make four loops of each ribbon (holding them between by fingers) and then tie them together with another piece of ribbon.  I hope that makes since...I'm not the best at explaining this.  I just make them :) 

Then it is time to start assembling the wreath.  I use tie wraps for most everything I put on my wreaths.  Its easier to work with than wire and holds better than glue. 

This is what it looks like with the tie wraps in action.  Not the best of shots but you get the picture.
See it hidden in there?  After I'm done I will cut the ends off and hide it in the branches.  Easy peesy lemon squeezy!

Before I tie wrap the ornaments on I will hot glue the tops on to make sure they don't fall off!  I speak from experience thus the concern with glass balls. 

Then I just start randomly putting things on until I achieve the look I want...no rhyme or reason to it...


I love how all the elements came together don't you!  It is so fun an festive!  All the little pops of color just make me happy when I look at them. 

Have you started your Christmas decorations yet?  

I'm linking this post up to the following places...Lets get this party started!

Thursday, November 10, 2011

Something sweet this way comes...


November Birchbox

Color me happy!  Yesterday when I got home from work I found this little box of happy sitting on my front porch!  (insert happy dance here)


I opened it up to find out what was inside...just like last time, I was greeted with this awesome little love note letting me know what treasures await me.


I just love that it comes all wrapped up in pink tissue paper don't you?


Check out all those goodies!  WOOHOOO!  And mascara too!  LOVE IT!


My absolute FAVORITE piece in all this is this little tiny pink piece of elastic...


Can you see it in there?  It is a hair tie...to be used like a rubber band!  How cool is that???  I immediately pulled it out and tied my hair up into a pony tail with it.  This thing ROCKS ladies! It did not come loose at all like I thought it would.  AWESOME!


And there you have it ladies...my November Birchbox!  If you haven't already signed up to get yours just click here.  I promise it to be the best $10.00 you'll ever spend on "girly" fun stuff! 


Monday, November 7, 2011

A little bit of lovely...

Shelf Happiness...

I was shopping in Hobby Lobby the other day minding my own business...looking at all the Christmas decorations they have out and realizing how VERY little time I have to get all my Christmas Projects done.  I was totally stressing out when I came across this little bit of lovely just sitting there.  It had all the elements that I love...wire baskets, industrial metal, rustic wood...and these lovely little hooks!  OH MY!  I picked it up to check out the price...$99.99.  GASP!  Uh, no!  But WAIT!  As I was leaning down to put my treasure back I spotted the most wonderful sign of all...50% OFF!  (que the harps please).  I can't re-create this look for $100.00 let alone $50.00.  SNAG!  My mind instantly began reeling with where I was going to put it.  I knew the PERFECT spot!
Squeal!   I am in total love with this!  Isn't she just B-E-Autiful?  I mean seriously...check out her little baskets and hooks...they are perfect for hanging my aprons on, which I currently have a small obsession with :) 

I have always wanted a place to display my Grandmothers cookbook and now I have it.  Mr. AKM was also excited that I was able to put his Grandmothers cookbook out on display (hers is the old brown one).  
Aren't those hooks the sweetest?  My heart is all a flutter.  The moment I saw them I knew that they would hold my precious aprons for all to see.  In the very near future those aprons will be for sale in my Etsy shop if you too have an apron obsession and want to own one :)

And here is just some photo love for you.  Feel free to drool...just go grab yourself a napkin to stop it from dripping on your computer screen.
What I love most about this shelf...the fact that I can decorate it for all the holidays AND it is functional.  There is a basket for each one of us to put our little pocket goodies into at the end of the day.  Well, as soon as I make some little basket liners for them. 

Hope you find yourself a little "shelf happiness" today! 

See this post partying here....

Wednesday, November 2, 2011

Get Crafty...


Dreamin' in full color

I layed in bed last night day dreamin'...or night dreamin' since it was night and I was in bed...of a place that I could go to and call it all my own.  A place where I was free to create to my hearts content.  A place where I could spread out rolls of paper to draw my ideas out on and places where I could post those "ideas" all over my walls.  A place with "pops" of color everywhere and places for all my fabric and yarn and glitter and glue and colored pens and pencils to neatly be put away.  In my mind I saw this...
Pinned Image
Source
I love the turquoise and orange pops of color and the wooden work top and the roll of paper...SQUEAL!  Its like they pulled this picture right out of my head!

family circle
Source
Again, I am drawn to the turquoise and orange in this room but I also love the peg board on the walls to hang ribbons from and the little cubbies to store wrapping paper.  Swoon!
63585989_2d87b3a402
Source
Well, we all know that this is Pottery Barn....and when do they ever get it wrong?  Um, like NEVER!  I love all the counter and storage space underneath and the shelf that wraps the top of the wall.  I have visions of baskets filled with all my "goodies" and little chalkboard labels hanging from them.  While this room does not have my favorite colors of turquoise and orange (YET) it still makes my heart get all a flutter.  

In my room I see these things...
Pinned Image
Source
I see the counter bar stools and the hardwood floors (which I already have) and then I see this rug covering my floor...
Pinned Image
Source
I'm sure you can figure out why...um, perhaps the orange and turquoise???  And the fact that it is just plain FUN! 

This fabric will surely be used to accessories my windows.
Pinned Image
Source


Ok, I have to be honest...this fabric was the start of my inspiration for my future craft room...all others came from this. 
I vision the walls in a pale grey...the counter will be a bar stool height with a rustic wood top stained in my all time FAVORITE Minwax Dark Walnut.  The base will either be some sort of industrial metal legs or an assortment of cubbies painted either in white or turquoise.  And this will be on my wall to help me keep track of time as I'm sure countless hours will be lost in this space...

Pinned Image
Source

And without a doubt there will be LOTS of this going on in here...
Pinned Image
And this...

craft storage

And even some of this...

Pinned Image

I love using mason jars to store things in.  I have a bit of an obsession with them actually :)  I'm not ashamed to admit it.  If I see an old blue one with a zinc lid...I MUST OWN IT!

So what do you dream of when you lay in bed at night?  Is your head filled with visions of cubbies and baskets and paper galore?  Tell me your craft room hopes and dreams!  I'd love to hear them!

LinkWithin

Related Posts Plugin for WordPress, Blogger...